Let There Be Light and Soft Water and...
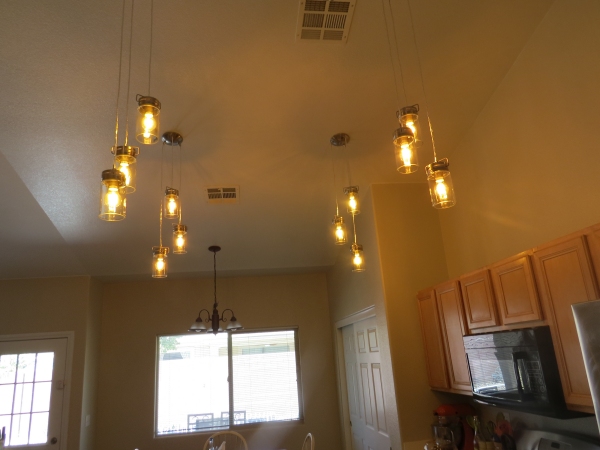
/She said (actually she requested) “Let there be light … and soft water … and enough chairs at the kitchen table and ...” and there was. We may be off the boat, but David and his brother, Paul, have been up to their eyeballs in house projects. There always seems to be something to do and the guys have been busy. The kitchen lighting at the new house was the pits. Cathedral ceilings in the kitchen dispersed the light, which was already pretty anemic, making the lighting in the work areas shadowy and inadequate. Mary is a fan of the “industrial theme” and we chose lights (lots of them) that looked like inverted canning jars with brushed nickel trim and added vintage style LED bulbs. Since there were already light fixtures in place, the job of connecting them up was pretty straightforward other than the ceiling is about 12-14 feet high and required David's new super ladder to reach them. The result was bright, to say the least, and he's now thinking of adding a dimmer switch.
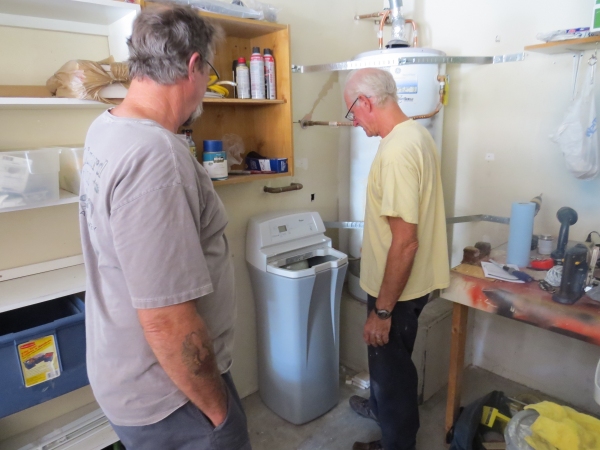
The water in the Las Vegas desert is hard, i.e. it contains lots of minerals, especially calcium and magnesium, which deposit and build up in pipes and eat away at sink fixtures. David did some research and was able to ascertain that on a scale where “1” is soft water, “2” is medium and “3” is hard water, Las Vegas' water is an 18. We needed a water softener to take care of the problem. We purchased one at Lowe's, the guys had it up and running in a day which included cutting into the incoming water main and then installing a drain for the regeneration outflow. There is a noticeable difference, especially in the shower. Soap actually lathers now.
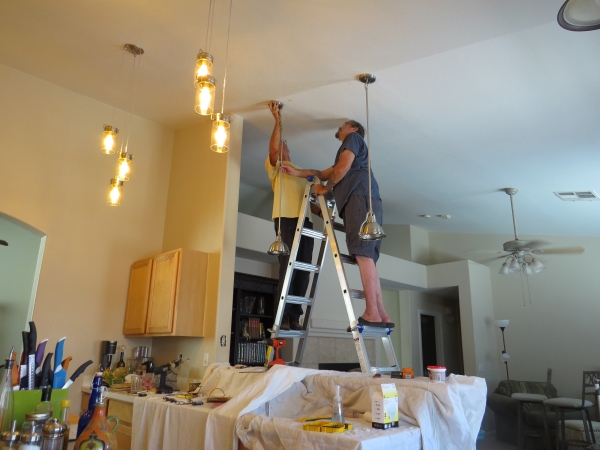
The latest project was adding two pendant lights over the breakfast bar between the kitchen and family room which also provided more light over the sink. We kept with the industrial, brushed nickel theme and the result was awesome. This project was complicated by the fact that no lights existed in the area and thus new wiring for the lights and the switch had to be installed from the attic. Knowing me the way he does, David suggested that the girls find an outside diversion (go shopping) for the day while the guys tackled the light installation. Good thing because the mess was overwhelming. That said, the project was nearly done and the clean-up had begun when we returned home to find the lights in place and looking great.
Midst all the projects, we still find time to scour the local thrift shops and add to our home furnishings. We've added two dining room chairs, a sleeper-sofa and six new kitchen chairs plus a couple of lamps … all pre-owned and ridiculously priced. We also discovered a newly opened IKEA store on the west side of town and though we didn't purchase much, we got some great ideas.
It's time to start thinking about Nine of Cups again. Soon, we'll begin ordering boat parts and making our plans for heading back East at the beginning of September. Time flies when you're having fun.
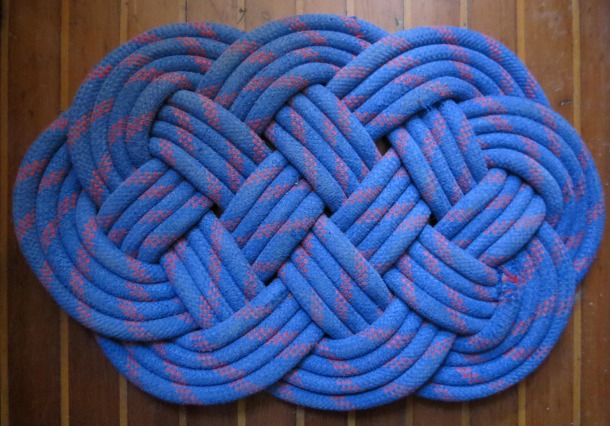 A few years ago I did a blog on making a nautical rope rug, or in sailor's parlance, an ocean plaitt mat. As I was making my 50th or so mat a couple of weeks ago, Marcie suggested doing it again as a video. It seemed like a good idea, so here is the video version.
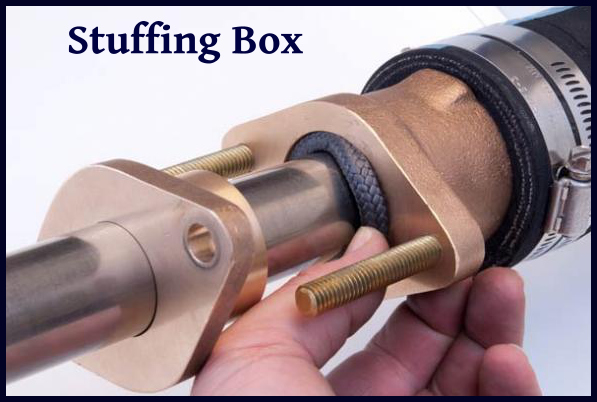
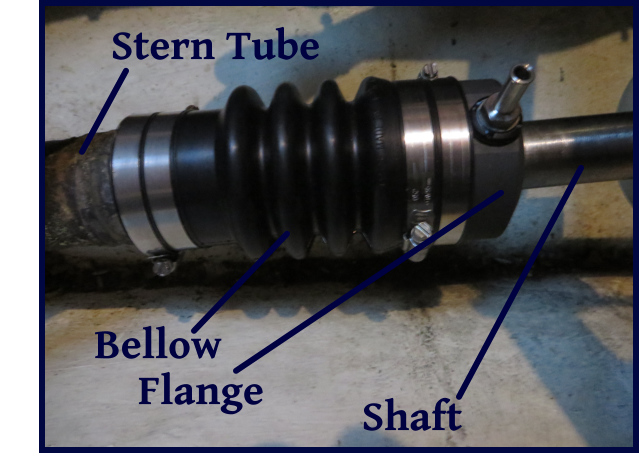
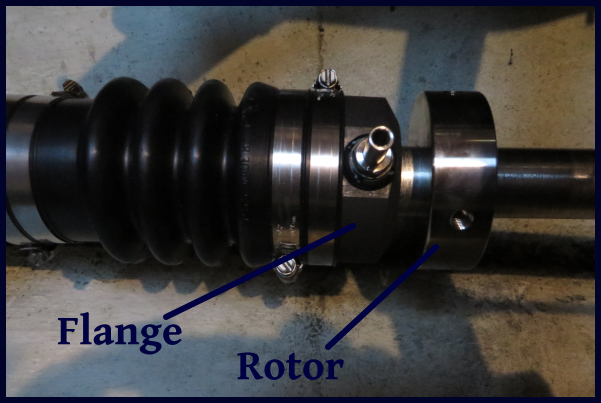
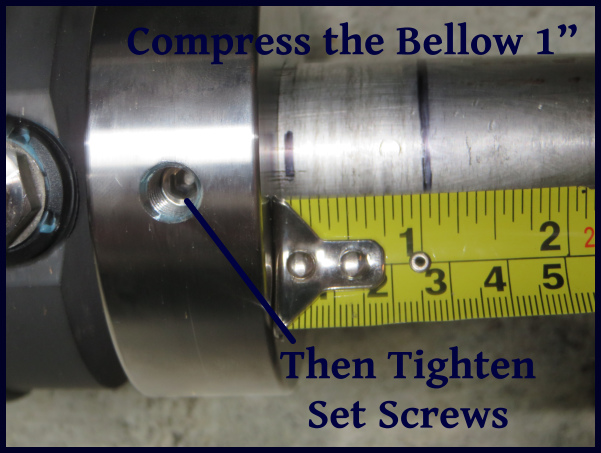
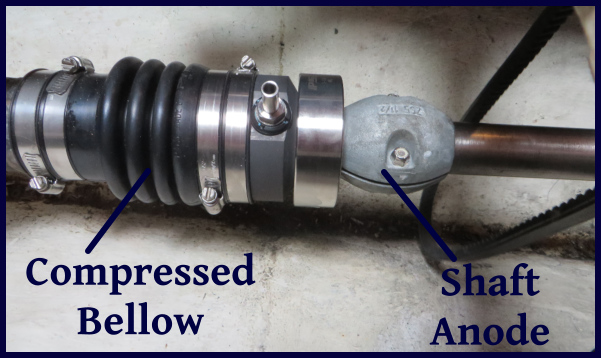
 As part of the process of replacing the cutlass bearing, the old shaft seal had to be removed. I installed a 'dripless' shaft seal about 14 years ago, and while I've serviced it regularly over the years, I thought it might be a good time to replace it as well.