The Blue View - Baby Needs a New Bailer

the new bailer Our old dinghy bailer is just about shot. The sun's UV rays have made it brittle and it's starting to crack. No matter – Marcie just finished a jug of laundry detergent, and it is the perfect size and shape for a new bailer. Being the parsimonious sailors that we are, we make use of everything we can.

When there is a lot of water in the dinghy, most anything will work as a bailer. That's not to say that a good bailer wouldn't be preferable, but I've used hats, oars, and even cupped hands quite effectively when there wasn't a real bailer available (although there were times when I wished I had webbed fingers). To move a lot of water quickly, it is more the technique than the tools at hand.

bailing with homemade bailer

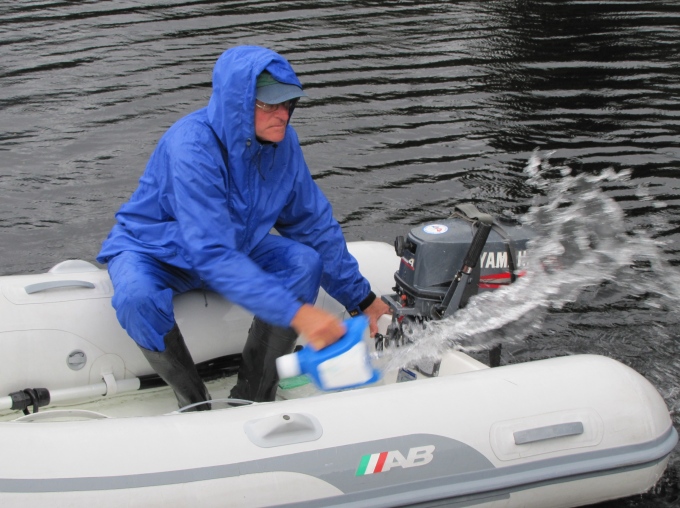
When a good bailer is worth its keep is when the water gets down to the last few inches. Then I want a flat bottomed scoop. We've certainly purchased those classy bailers sold at the chandleries in the past, but I don't find that they do any better job of bailing than my homemade jobs. They do last about twice as long in the sun, but twice nothing, which is what mine cost, is a lot less than the cost to buy a bailer.

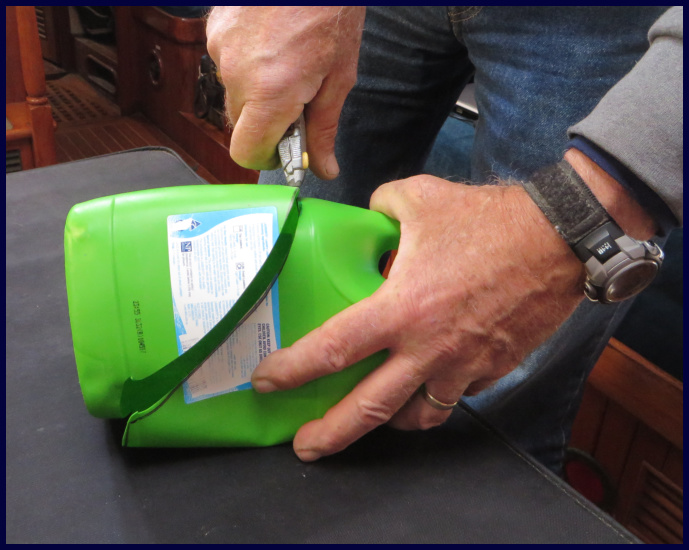
I find a 2L size laundry detergent jug is perfect … it is flat on the sides, has a handle, and is big enough to bail large quantities of water quickly, but small enough to dip out the last of the water from the small well near the transom of our dinghy. Usually, Marcie finishes up the laundry detergent in the current jug just about the time the old bailer has about had it. Any similarly shaped heavy plastic container with a screw-on lid will work, however -  bleach bottles, milk jugs, etc.  In a pinch, a gallon (4L) size jug will work, but is a bit too large and flimsy for my liking.

marking the bailer

beginning cut

cutting the bailer

When I'm done bailing, I stuff the bailing sponge into it. This weighs it down enough to keep it from blowing away.

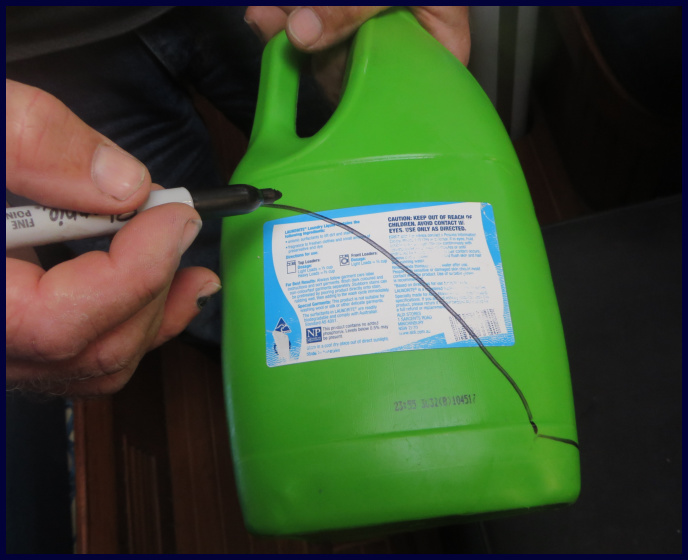
The first few times I made a bailer, I simply dug out my box cutter and hacked away. The bailers worked just fine, but were sometimes rather oddly shaped. Now I mark the jug where I intend to cut it. BTW, it took me approximately ten times longer to write the blog about making a bailer than it did to actually make it.

The Blue View - Prop Shaft Generator pt. 1

installed shaft generator

installed shaft generator

When we are anchored for any period of time, our solar panels and wind generator pretty much keep up with our power needs. On a passage, however, our requirements are higher. The additional electronics – auto pilot, nav instruments, AIS, radar, etc. - all require power, and we usually have to run the engine an hour or more each day to keep the batteries charged. There are a number of reasons why we dislike doing this. On a long passage, the amount of fuel required just to charge the batteries starts adding up. If we are on a significant heel, we have to alter course or reduce sail before and after running the engine. Using the engine at low RPMs and with a light load is hard on the engine.  And in addition, it is very annoying to disrupt that perfect broad reach on a warm, starry night by having to crank on the engine.

shaft generator monitor

shaft generator monitor

Several of our cruising friends have had good success with propeller shaft generators, and adding one to Nine of Cups has been on my to-do list for several years now. If we could generate another 2-3 amps while we were sailing, we probably wouldn't have to run the engine at all. When we were in Durban a few months ago, I decided to take on the project.

What does a prop shaft generator do? We have a fixed blade prop, and when we are sailing, the water moving against the prop causes the prop shaft to rotate. (We actually  have a prop shaft brake which prevents the shaft from rotating when the engine is off, but it can be disabled). By adding a pulley to the shaft, mounting a generator or alternator next to it, and connecting the two with a belt, we should be able to utilize the rotation of the shaft to generate power as we sail. That's the theory, anyway.  The rest is just details, right?

shaft generator rotation

shaft generator rotation

One the more important details is which generator to use and I've found several options. There are three types of generators/alternators that can be used for this application, and each has its own advantages and disadvantages.

Brush-type DC Motor.  The most basic DC motor, which has been around since he late 1800s, has a rotating coil mounted inside several permanent magnets attached to the outer housing. If a battery is connected to a 12 volt DC motor, it will spin. Conversely, if  the rotor of a brush-type DC motor is spun, it will produce a DC voltage. If the motor is big enough and it spins fast enough, it can charge a battery. The advantages are that it is inexpensive and it is simple to implement electrically. It has several disadvantages, however: since it has brushes, the maintenance requirements are higher; it generates electromagnetic interference (EMI), which may be a problem with an HF radio; the maximum allowable RPMs for this type motor is usually less than an alternator; and is more difficult to keep cool.

dc motor

dc motor

Brushless DC Motor. This type motor has permanent magnets attached to the rotor and windings that are attached to the housing. Since the windings don't rotate, the need for brushes is eliminated. The advantages of a brushless DC motor are: it requires less maintenance than a DC motor with brushes; generates little or no EMI; and is more efficient. On the other hand, the disadvantages are: it is more expensive; it generates a three phase AC output which requires a diode bridge to convert to DC; and the maximum allowable RPMs are usually less than an alternator.

Alternator. A typical automotive or marine alternator is also a candidate for a prop shaft generator. It overcomes some of the issues of a DC motor: since it is meant to be coupled directly to an engine pulley, the maximum allowable RPMs are quite high; they are made by the million, so the cost is quite low; the output is easily regulated by varying the field current; they are very efficient; and are self-cooling. The disadvantages are: the output is three phase AC, and must be converted to DC; and they are meant to run at high RPMs, so unless the windings are rewound with finer wire, the output at low RPMs is quite small. The biggest disadvantage, however, is that an alternator requires a field current of typically 3-5 amps. Unless the RPMs are quite high, the output will be negligible. In fact, the net amperage might even be negative if the RPMs of the shaft aren't high enough.

alternator

alternator

So which alternative did I choose? Actually, I found a hybrid of sorts that was a nice compromise. A company in the U.S. that makes components for wind turbines, WindBlue Power, buys standard automotive alternators and morphs them into brushless DC motors. They rewind the windings with finer wire so the output is higher at low RPMS; they replace the field coil with a permanent magnet, eliminating the need for the 3-5 amps of field current; and they remove the internal rectifying diodes – which, as will be discussed later, is another important issue. The resulting generator overcomes most of the shortcomings of a standard brushless DC motor for this application.

wind blue model

wind blue model

I'll talk about the design in more detail in next week's Blue View.

Chore List Growing

No matter what port we're in or what we've accomplished in the last port, there always seems to be more chores on the list than the time we've allotted to them. Could be there are lots of chores … could be we're lazy. Whatever ... the chore list is growing and we're attacking it slowly. We want to make sure we don't run out of chores and get bored. luderitz chore list

We didn't break much on the trip here. Thank, Neptune! Heck, it was only 77 hours, not an ocean passage, so we were hoping we'd arrive in basically one piece and, thankfully, we did. We did break a sail slide which David has already repaired … downwind sailing with big gusts and waves is tough on the main. He's also been fiddling with the new Dyneema reefing lines which aren't quite right. He wants to add new fair leads to the bottom of the boom to raise the main sheet off the top of the bimini … we've noticed some chafe there.

The dreaded list of sewing repairs has gotten out of hand. The zipper broke on my foul weather bibs and needs replacing. Getting too chubby, you insinuate? Perish the thought … they're 15 years old and the plastic ziphead just snapped right off. David's broke, too, but his just require replacing the little lanyard on the pull-tab.

new zipper on bibs

I noticed that the stitching on the boom crutch cover has disintegrated with UV exposure over time, as have the covers for the handholds on the coach roof. All need restitching.

boom crutch cover

The outboard engine cover which is only a couple of years old is falling apart. David has lashed it with line till I get around to making a new one. I think it wasn't made as robustly as I thought it was and we have some thoughts on the replacement design.

outboard engine cover

David has also noticed some chafe on the forward hatch where the dinghy rests during passages. We need to make a chafe guard of some sort to take care of this.

The head hoses are starting to calcify and need some attention and the shaft brake was squeaking a bit during the last passage … enough to warrant an adjustment.

So … as you can see, the chores never end. BUT, we're in a charming little seacoast town in  Namibia … on a free mooring ... where people are very friendly,  skies tend to be blue and the days are mostly warm and sunny. Really … we have no complaints … but I guess we need to get busy.